
Sanders: The Secret to a Professional Finish on Your Wood Projects
Finishing is an essential step in wooden projects, as it provides not only a pleasant visual appearance, but also protection and durability to the piece. In this sense, sanders emerge as a fundamental tool for achieving a professional finish.The purpose of this article is to show how sanders can facilitate and improve the finishing process on wood projects. With them, it is possible to obtain smooth surfaces, free from imperfections and ready to receive the application of sealers, varnishes, waxes or other finishing products.
Table of Contents
Why is finishing so important in wood projects?
Finishing is a fundamental step in wooden projects, as it directly influences the aesthetics, protection and durability of the pieces. Visual appearance is a crucial aspect of any project, and a well-done finish can transform a simple piece into a true work of art. Furthermore, the finish has the role of protecting the wood against humidity, termites and other harmful agents, thus extending the useful life of the piece.
By carrying out a suitable finish, it is possible to protect the wood against water absorption, preventing it from deforming and becoming fragile over time. Furthermore, the finish also protects against the action of termites and fungi, which can compromise the wood structure. In this way, the finish not only guarantees the beauty of the project, but also its integrity and resistance.
The longevity of a piece of wood is directly related to the quality of the finish. A good finish prevents natural wear and tear caused by use and exposure to the environment, preventing cracks, peeling and other damage that could compromise the structure of the piece. Therefore, investing in a professional finish is essential to ensure the durability of wooden pieces over time.
In summary, finishing is a fundamental aspect in wooden projects, as it guarantees aesthetic beauty, protects the piece against damage and increases its durability. Therefore, when carrying out any carpentry or carpentry project, it is essential to pay due attention to the finish, using sanders as allies to obtain professional results. With the correct techniques and proper use of sanders, it is possible to achieve an impeccable finish and add even more value to wooden pieces.
Types of sanders and their specifications
1. Belt sander
The belt sander is a very versatile and efficient tool, widely used in woodworking projects. Its main feature is the presence of a sanding belt, which is responsible for grinding and leveling the surface.
It is ideal for working in large, flat areas, as it has a greater material removal capacity. Furthermore, the belt sander is very useful in restoration projects where it is necessary to remove layers of old paint or varnish.
Among the advantages of the belt sander, the speed and efficiency of sanding stand out, as well as the possibility of adjusting the working speed. On the other hand, its disadvantages include its size and weight, which can make it difficult to handle in smaller areas.
2. Orbital sander
The orbital sander is a very popular option among professionals who work on wood projects. It has a random circular movement that provides smooth and uniform sanding, avoiding unwanted marks on the surface.
This type of sander is ideal for projects that require a more delicate finish, such as furniture and decorative objects. Furthermore, the orbital sander is also efficient in removing layers of paint or varnish.
One of the main advantages of the orbital sander is its versatility, as it can be used on different surfaces, such as wood, plastic and metal. Another advantage is its practicality, as it has a quick sandpaper change system. However, it is important to note that the orbital sander may require a little more time to complete a job, when compared to other types of sanders.
3. Disc sander
A disc sander is an excellent option for projects that require more aggressive grinding. It has a sanding disc that rotates at high speed, providing fast and efficient sanding.
Large projects, such as hardwood floors and decks, are examples of common applications for the disc sander. This tool is capable of quickly removing imperfections, leaving the surface smooth and uniform.
The main advantages of the disc sander are its high material removal capacity and work speed. However, it is important to note that it can be a little more difficult to handle, especially for less experienced users. Furthermore, care must be taken not to damage the surface, as the disc sander has a high grinding power.
How to choose the ideal sander for your project
When deciding to invest in a sander to improve your wood projects, it is important to consider some aspects to choose the ideal tool. Taking into account the type of wood used , for example, is essential to guarantee the best performance of the sander. Some woods are harder and require a higher-powered sander, while others are softer and can be sanded with a simpler tool.
Another factor to be evaluated is the size and complexity of the project . Larger and more elaborate projects require a sander with greater reach capacity and different adjustments that allow you to reach difficult-to-reach areas. Smaller projects can be carried out with a more compact and simple sander.
Additionally, it is important to take into account the user’s experience level . More advanced sanders, with multiple functions and adjustments, may require more in-depth knowledge to use them correctly. Therefore, if you are a beginner, it may be interesting to opt for a simpler and easier to use sander.
The market offers a variety of sander models, such as belt sanders, orbital sanders and disc sanders. Each one has its specifications and characteristics, which must be considered when choosing. It is important to do prior research on each type of sander and understand which one best suits your needs.
An important tip when choosing the ideal sander is to consult the opinion of experts and professionals in the field who can offer guidance and suggestions based on their experience. This way, you can be sure that you are making the right choice and investing in the most appropriate tool to achieve professional results in your woodworking projects.
Tips for using and caring for your sander
When using a sander to obtain a professional finish on your wood projects, it is important to take some precautions and follow some tips to ensure safety and efficiency.
Preparation of the work environment is essential before starting to use the sander. Make sure the area is clean and organized, free from loose objects that could interfere with work. Furthermore, it is important to ensure good lighting in the environment, to better visualize the areas being sanded.
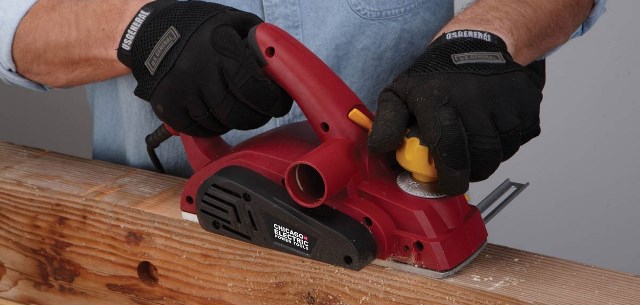
The correct use of Personal Protective Equipment (PPE) is also essential when using sanders. Always wear safety glasses to protect your eyes from possible wood splinters, gloves to avoid direct contact with the sander and ear protectors to protect your ears from the noise produced by the machine.
Cleaning and maintaining the sander is important to ensure its proper functioning and extend its useful life. After each use, clean the machine thoroughly, removing accumulated wood residue and dust. Regularly check the sander’s moving parts, such as belts and bearings, to ensure they are working properly. Lubricate the parts recommended by the manufacturer, following the instructions in the manual.
By following these tips and precautions, you will be able to use your sander safely and efficiently, obtaining professional results in your wood projects. Always remember to read your sander’s instruction manual and follow the manufacturer’s recommendations to make the most of this important tool when finishing your wooden pieces.
Step by step for a professional finish
- Wood preparation
Before starting the finishing process, it is essential to prepare the wood properly. This involves removing imperfections, such as splinters and irregularities, which could compromise the final result. To do this, you can use a suitable sander, which makes the work easier and provides a more uniform finish. Furthermore, it is important to fill gaps and holes in the wood, using specific wood filler.
- Initial sanding
After preparing the wood, it is time to perform the initial sanding. At this stage, it is essential to use the correct sander for the type of project and wood in question. An orbital sander is best for flat surfaces, while a disc sander may be more efficient for corners and edges. When sanding, it is important to follow some tips to obtain a uniform result, such as sanding in the direction of the wood grain and applying gentle, constant pressure.
- Sealer application
After the initial sanding, it is recommended to apply a sealer to the wood. Choosing the appropriate sealer is essential to guarantee a good finish and protection. There are different types of sealers available in the market, such as nitrocellulose sealer, PU sealer and acrylic sealer. It is important to choose the sealer according to the project characteristics and wood protection needs. The sealer must be applied following the manufacturer’s instructions, evenly and without excess.
- Final sanding
After applying the sealer and completely drying, it is time to carry out the final sanding. At this stage, fine-grained sandpaper is used to refine the finish. The objective is to remove small imperfections, such as marks from coarser sandpaper or irregularities in the sealer. It is important to sand smoothly and evenly, taking care not to damage the layer of sealer already applied.
- Final touch
The last step to achieving a professional finish on wood projects is the application of the final product, such as varnish, wax or another chosen finish. Before applying the product, it is essential to thoroughly clean the surface, removing any sandpaper residue or dust. Applying the varnish, for example, can be done with a brush or foam roller, following the manufacturer’s instructions and respecting the drying time between coats. Furthermore, it is important to use specific techniques, such as smooth and continuous movements, in order to uniform the application of the product. For an impeccable result, it is essential to take extra care, such as avoiding the formation of bubbles or brush marks.
By following this step-by-step guide, you will have all the information you need to obtain a professional finish on your wood projects. Always remember to choose the appropriate sander, use the correct products and follow the recommended techniques. With practice and due care, you can achieve surprising results and add even more value to your wooden creations.
Conclusion
Finishing is an essential step in wood projects, as it not only improves the aesthetic appearance, but also protects the piece against moisture, termites and other damage. To guarantee a professional finish, the use of sanders is essential. These tools are responsible for removing irregularities from the surface, leaving it smooth and ready to receive the appropriate treatment.
There are different types of sanders available on the market, such as belt sanders, orbital sanders and disc sanders. Each of them has specific characteristics and applications, and it is important to choose the most appropriate option for the project in question. Furthermore, it is necessary to consider the type of wood being crafted, the size and complexity of the project, as well as the user’s level of experience.
When using a sander, some care must be taken to ensure the safety and efficiency of the process. It is important to prepare the work environment, using adequate protection, such as a mask, glasses and gloves. Furthermore, regular cleaning and maintenance of the sander is essential to extend its useful life and ensure satisfactory performance.
The professional finishing process for wood projects involves a few steps, such as preparing the wood, removing imperfections and applying a sealer. Then, the sander is used to perform an initial sanding and, subsequently, a final sanding with fine-grained sandpaper. Finally, the varnish, wax or other finishing product is applied, taking care to obtain an impeccable result.
In short, the finish on wooden projects is crucial for the aesthetics, protection and durability of the pieces. Sanders play a fundamental role in this process, facilitating and improving the finish. Therefore, it is highly recommended to use sanders in your projects in order to achieve professional results and ensure satisfaction with the work performed.